Building a Custom Library
This page goes over creating a custom Mol* based library usable inside a <script> tag in an HTML page using the
esbuild tool.
- Create a new npm/yarn package
- Install
molstarandesbuildpackages
mkdir molstar-libcd molstar-libnpm initnpm install molstarnpm install esbuild --save-devExample Library Code
Section titled “Example Library Code”Create new file src/index.ts (or .js if you don’t want to use TypeScript):
import { DefaultPluginSpec, PluginSpec } from 'molstar/lib/mol-plugin/spec';import { PluginContext } from 'molstar/lib/mol-plugin/context';
export async function initViewer(element: string | HTMLDivElement, options?: { spec?: PluginSpec }) {    const parent = typeof element === 'string' ? document.getElementById(element)! as HTMLDivElement : element;    const canvas = document.createElement('canvas') as HTMLCanvasElement;    parent.appendChild(canvas);
    const spec = options?.spec ?? DefaultPluginSpec();
    const plugin = new PluginContext(spec);    await plugin.init();
    plugin.initViewer(canvas, parent);
    return plugin;}
export async function loadStructure(    plugin: PluginContext,    url: string,    options?: { format?: string, isBinary?: boolean }) {    const data = await plugin.builders.data.download(        { url, isBinary: options?.isBinary }    );    const trajectory = await plugin.builders.structure.parseTrajectory(        data,        options?.format ?? 'mmcif' as any    );    const preset = await plugin.builders.structure.hierarchy.applyPreset(trajectory, 'default');    return preset;}
Building the Library
Section titled “Building the Library”Add new commands to the scripts section of the package.json file
"scripts": { "build": "esbuild src/index.ts --bundle --outfile=./build/js/index.js --global-name=molstarLib", "watch": "esbuild src/index.ts --bundle --outfile=./build/js/index.js --global-name=molstarLib --watch"}and run the command npm run build (or watch for interactive development experience). This will create
build/js/index.js file which can be imported with a <script> tag and the exported functions called view the
molstarLib prefix (you can customize this parameter).
Using the Library
Section titled “Using the Library”Create file build/index.html:
<!DOCTYPE html><html lang="en"> <head> <meta charset="utf-8" /> <meta name="viewport" content="width=device-width, user-scalable=no, minimum-scale=1.0, maximum-scale=1.0"> <title>Mol* Library Example</title> </head> <style> #viewer { position: absolute; width: 800px; height: 600px; } </style> <script type="text/javascript" src="./js/index.js"></script> <body> <div id="viewer"></div> <script type="text/javascript"> async function init() {1 const plugin = await molstarLib.initViewer("viewer"); await molstarLib.loadStructure( plugin, "https://models.rcsb.org/4hhb.bcif", { isBinary: true } ); } init(); </script> </body></html>After opening index.html in a browser, you should see
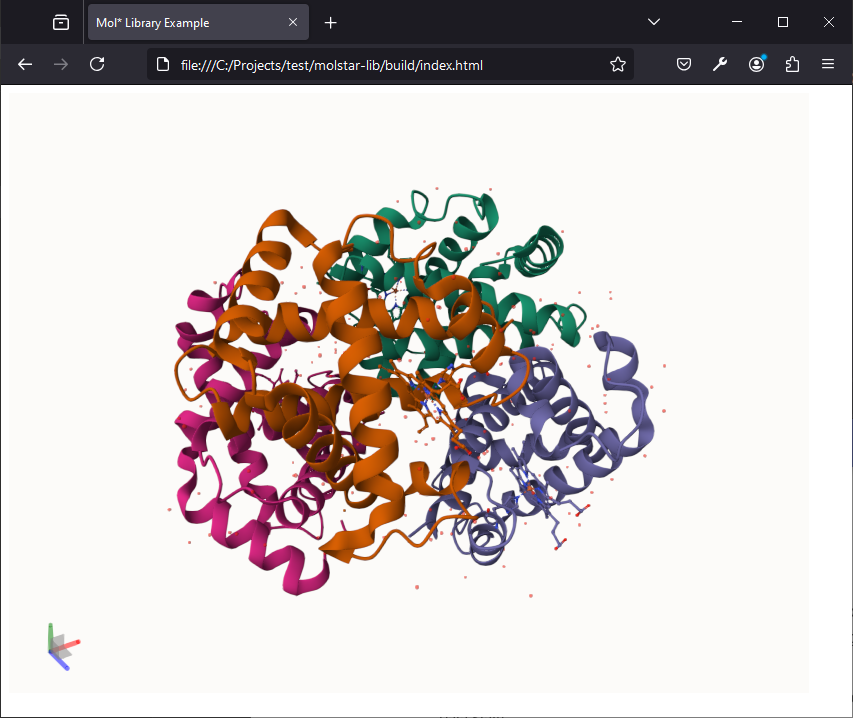
Using Mol* React UI
Section titled “Using Mol* React UI”The above example does not make use of the default Mol* React UI and any UI components are therefore the author’s responsibility. The below examples show how to (re)use the Mol* React UI.
-
Create
src/ui.tsx:import React from 'react';import { createRoot } from 'react-dom/client';import { DefaultPluginUISpec, PluginUISpec } from 'molstar/lib/mol-plugin-ui/spec';import { PluginUIContext } from 'molstar/lib/mol-plugin-ui/context';import { Plugin } from 'molstar/lib/mol-plugin-ui/plugin';export async function initViewerUI(element: string | HTMLDivElement, options?: { spec?: PluginUISpec }) {const parent = typeof element === 'string' ? document.getElementById(element)! as HTMLDivElement : element;const spec = { ...DefaultPluginUISpec(), ...options?.spec };const plugin = new PluginUIContext(spec);await plugin.init();createRoot(parent).render(<Plugin plugin={plugin} />)return plugin;}export async function loadStructure(plugin: PluginUIContext, url: string, options?: { format?: string, isBinary?: boolean }) {const data = await plugin.builders.data.download({ url, isBinary: options?.isBinary });const trajectory = await plugin.builders.structure.parseTrajectory(data, options?.format ?? 'mmcif' as any);await plugin.builders.structure.hierarchy.applyPreset(trajectory, 'default');} -
Create
src/style.scss:@use '../node_modules/molstar/lib/mol-plugin-ui/skin/light.scss'; -
Create
build/ui.html:<!DOCTYPE html><html lang="en"><head><meta charset="utf-8" /><meta name="viewport" content="width=device-width, user-scalable=no, minimum-scale=1.0, maximum-scale=1.0"><title>Mol* UI Library Example</title></head><link rel="stylesheet" type="text/css" href="css/style.css" /><style>#viewer {position: absolute;inset: 0;}</style><script type="text/javascript" src="./js/ui.js"></script><body><div id="viewer"></div><script type="text/javascript">async function init() {const plugin = await molstarLib.initViewerUI("viewer", {spec: {layout: {initial: {isExpanded: true,showControls: true,},},}});await molstarLib.loadStructure(plugin, "https://models.rcsb.org/4hhb.bcif", { isBinary: true });}init();</script></body></html> -
Install
sass:npm install sass -save-dev(or useesbuildplugin andimportthe scss file inui.tsx) -
Add scripts to
package.json:"build-ui": "esbuild src/ui.tsx --bundle --outfile=./build/js/ui.js --global-name=molstarLib","css": "sass src/style.scss ./build/css/style.css" -
Run
npm run build-uiandnpm run css(skip if usingesbuild-sass-plugin) -
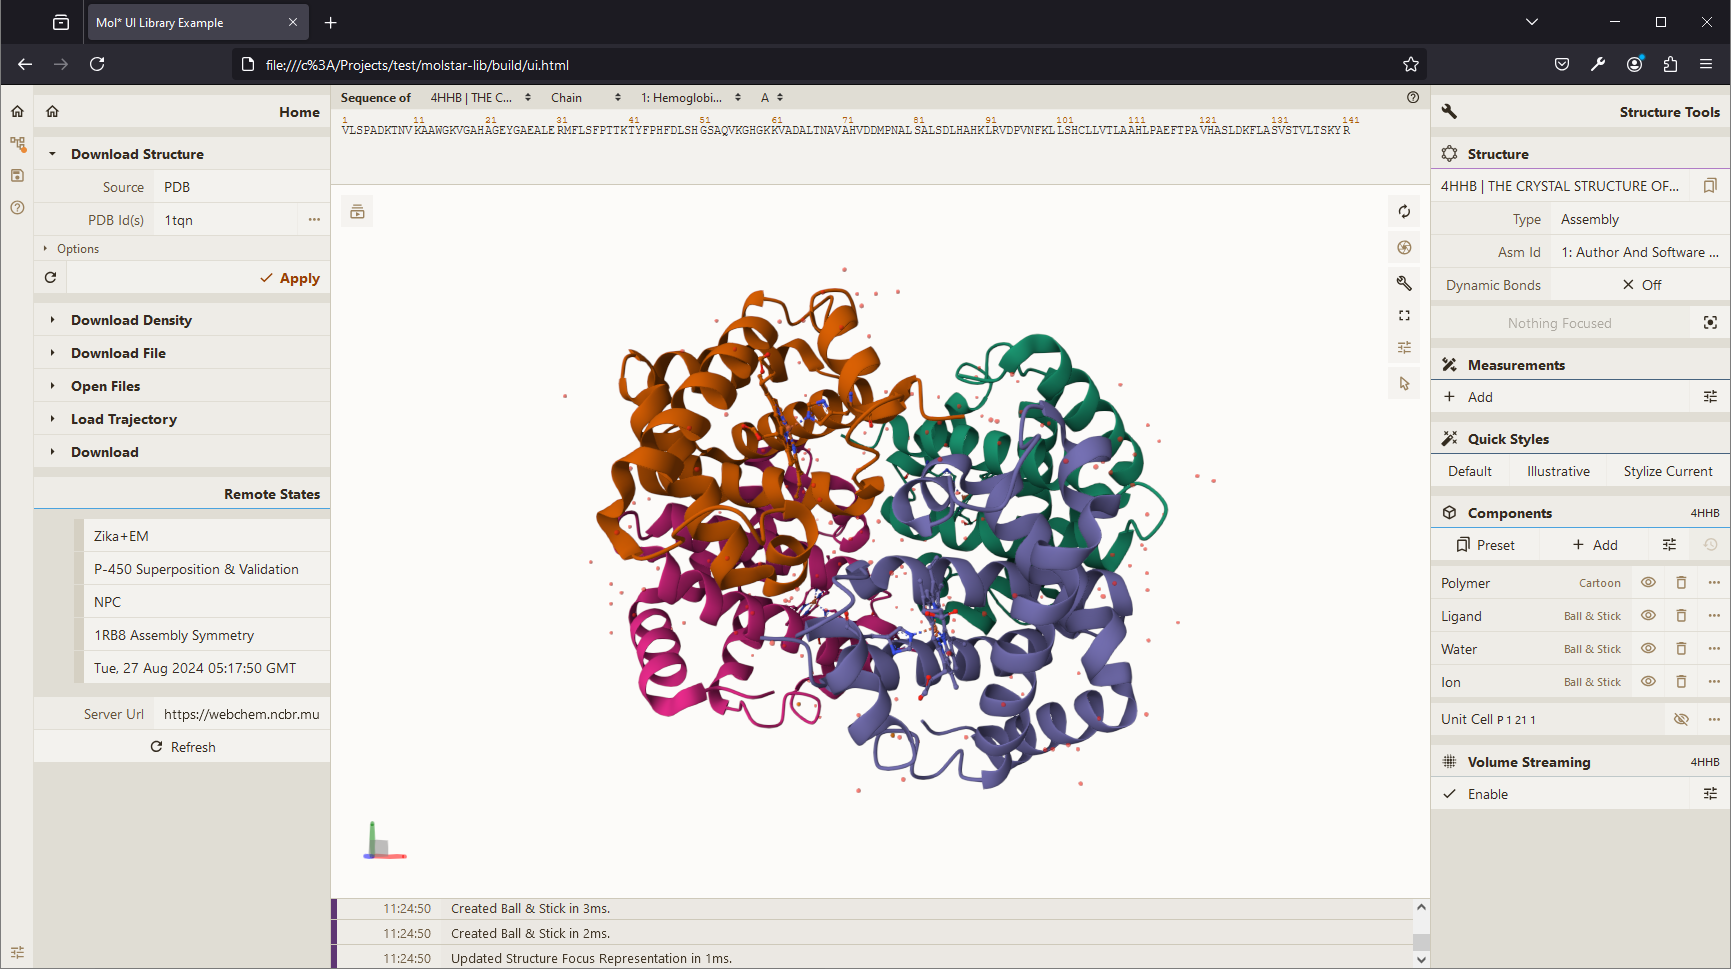
Opening
build/ui.html: