Camera Settings
Camera positioning is automatically managed in most cases. Use explicit camera settings when you need precise viewpoints or for creating cinematic story transitions.
Camera position and orientation in MolViewSpec can be controlled using two approaches:
cameranode - Explicit position, target, and orientationfocusnode - Automatic framing of selected components
Camera Node
The camera node directly sets camera position and orientation. It’s a child of the root node.
Understanding Camera Parameters
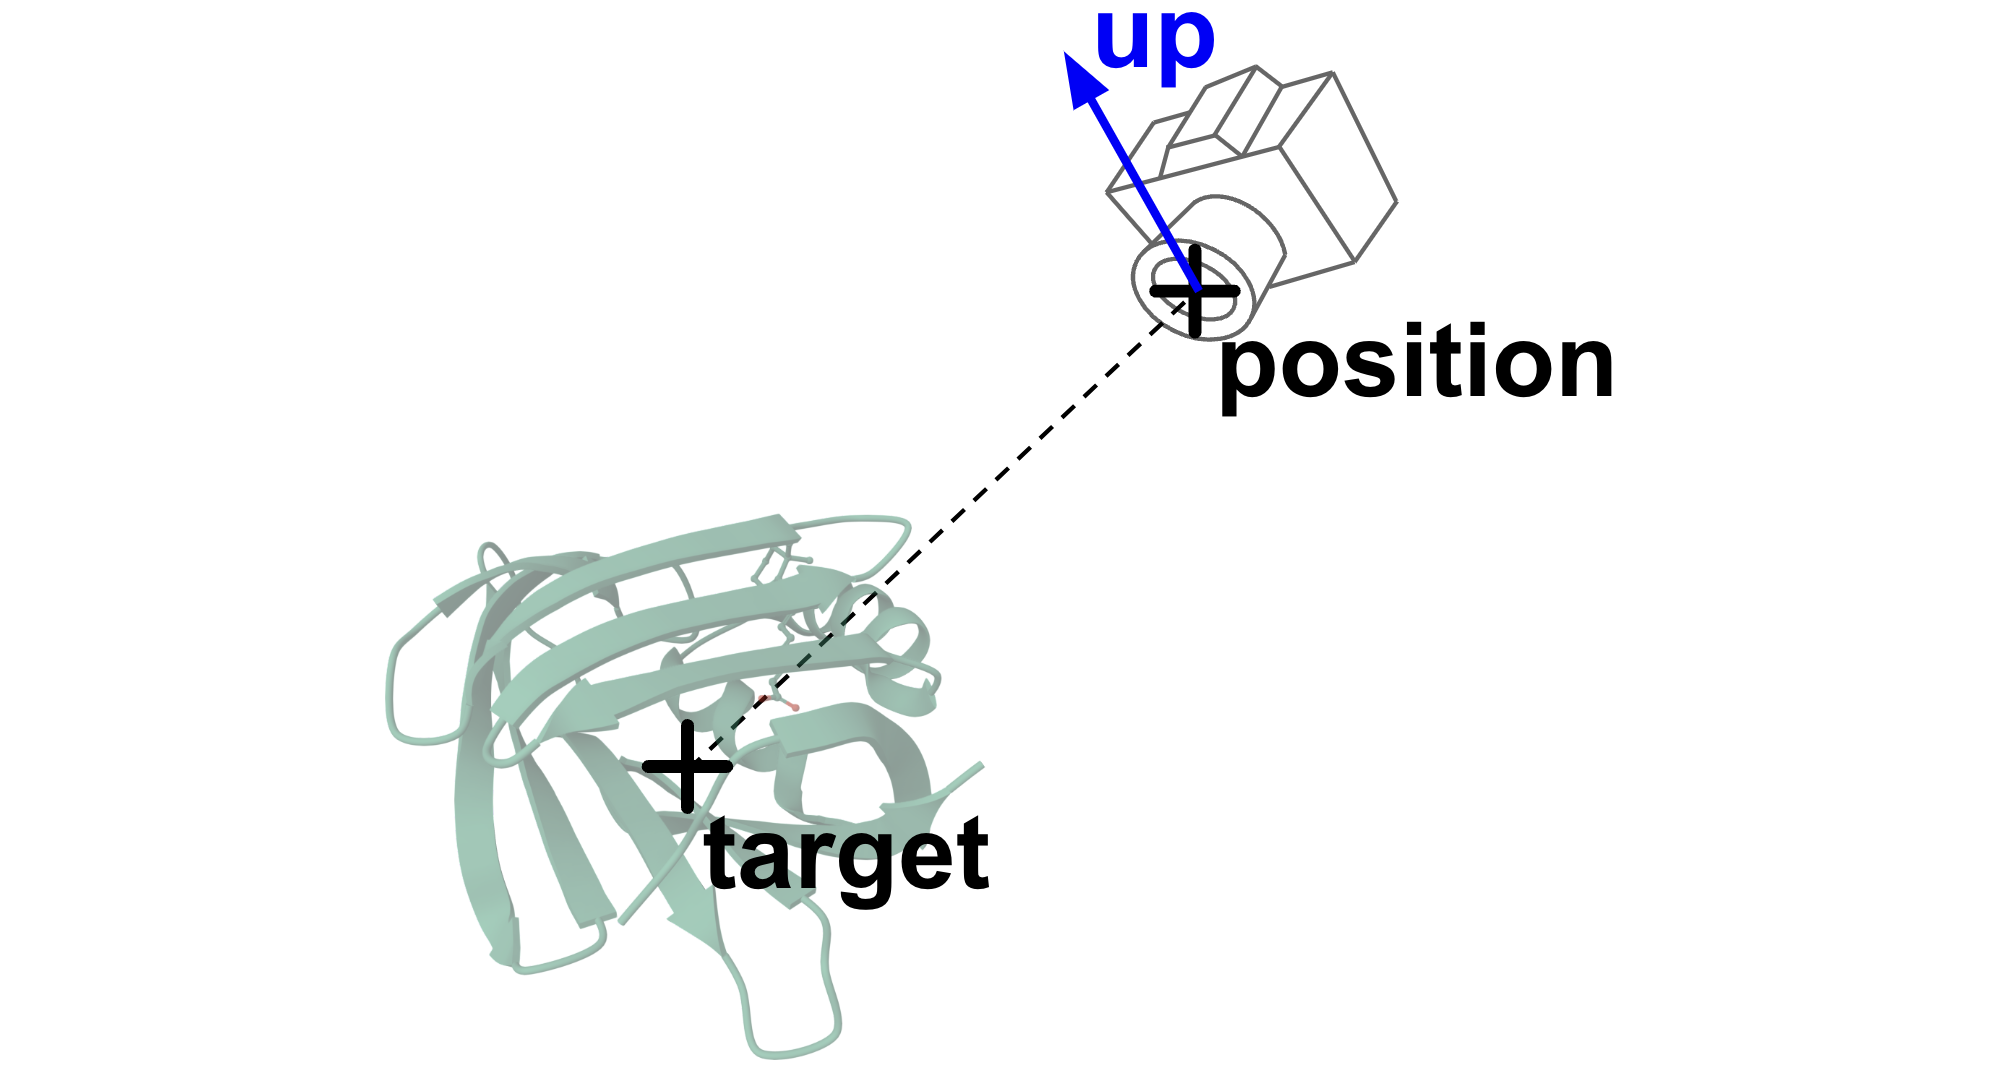
- Target: The point the camera is looking at (center of view)
- Position: Where the camera is located in 3D space
- Up: Which direction should point “up” in the final view
Up Vector Adjustment
The up vector doesn’t need to be perpendicular to the camera-target line. MolViewSpec automatically adjusts it:
\[ \mathbf{u}_{\text{adj}} = \text{normalize}\left(((\mathbf{t}-\mathbf{p}) \times \mathbf{u}) \times (\mathbf{t}-\mathbf{p})\right) \]
This means you can specify an approximate up direction, and it will be corrected automatically.
Focus Node
The focus node automatically frames a component, setting the camera to show the entire component nicely.
Parameters
direction(optional): Camera-to-target direction (default:[0, 0, -1])up(optional): Up direction (default:[0, 1, 0])
Example
structure
    .component({ selector: 'ligand' })
    .representation({ type: 'ball_and_stick' })
    .focus();

structure
.component({ selector: { label_asym_id: 'A' } })
.representation({ type: 'cartoon' })
.focus({
    direction: [1, 1, -1],  // View from upper-right
    up: [0, 1, 0]
});
Canvas Node
The canvas node sets global view properties like background color.
Common Patterns
// Top-Down View
builder.camera({
    target: [0, 0, 0],
    position: [0, 100, 0],  // Directly above
    up: [0, 0, -1]          // Z-axis points up
});

// Side View
builder.camera({
    target: [0, 0, 0],
    position: [100, 0, 0],  // From the side
    up: [0, 1, 0]           // Y-axis points up
});

// Focus on Active Site
structure
    .component({
        selector: {
            label_asym_id: 'A',
            beg_label_seq_id: 100,
            end_label_seq_id: 120
        }
    })
    .representation({ type: 'ball_and_stick' })
    .focus();
Angled Overview
builder.camera({
    target: [0, 0, 0],
    position: [50, 50, 50],  // 45° angle
    up: [0, 1, 0]
});
Camera in Stories
In MolViewStories, camera positions are often captured automatically:
- Automatic Camera: Default view when scene loads
- Manual Positioning: Use the viewer controls to position camera
- Capture Snapshot: Save current camera position
- Use in Code: Reference saved camera in your scene JavaScript
When you position the camera using the viewer controls, you can capture that position as a snapshot. This snapshot can then be applied in your scene code without needing to manually specify coordinates.
Advanced: Field of View Adjustment
MolViewSpec uses a “reference camera” concept to ensure views look consistent across different field-of-view (FOV) settings. This means:
- Camera positions work the same way regardless of viewer FOV
- A sphere at distance
2Rfrom a camera will fit nicely in view - Reference FOV is 60° (perspective) or ~53° (orthographic)
You generally don’t need to worry about this - it’s handled automatically!
See Also
- Tree Schema - Complete node reference
- Official Camera Documentation - Technical details
- Animations - Smooth camera transitions